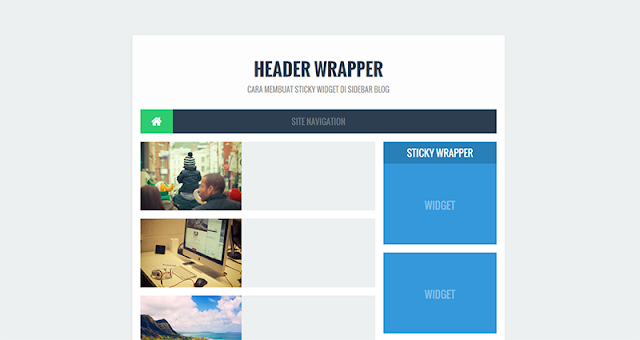
How to Make Your Widget Sticky ?
Also Read
Today We are happy to see again here with some trick that you may need to know . Below is the tutorial and codes that will describe about how to configure out this on your Blogger template and also your Blogger Widget .
How to Make Your Widget Sticky ? This tip really helpful for who want their Widget Float along with when they scroll down or up and it will go to original place when it meet your current target .
First that you have to do is go to Template then click on Edit HTML Then Copy Java script Code Into your template where around Head [<head> Java Script Code </head>] or In Your Body Section [<body> Java Script Code </body>] Both of these places will be work .
You might want to know what is your Widget ID right ?
Okay let find it with me by clicking on Jump to widget that show you in Template and than note yourself that which widget you want .
After we configure about Java Script Code in our Template now we need to Install Some CSS Too by following me . You just Find before]]> </ b: skin> or </ style> place that CSS around them :
Yes it will be work as charm . If there is any question about How to Make Your Widget Sticky ? Please Leave us your comment .
 |
| Image By arlinadzgn |
First that you have to do is go to Template then click on Edit HTML Then Copy Java script Code Into your template where around Head [<head> Java Script Code </head>] or In Your Body Section [<body> Java Script Code </body>] Both of these places will be work .
<script type='text/javascript'>
//<![CDATA[
// Sticky Widget
function makemeSticky(e){function t(){var e=s.getBoundingClientRect();e.top<0?(n.className=a+" makesticking",n.style.width=i+"px"):n.className=a}var n=document.getElementById(e),s=document.createElement("div");n.parentNode.insertBefore(s,n);var i=n.offsetWidth,a=n.className+" makesticky";window.addEventListener("scroll",t,!1)}makemeSticky("HTML1");
//]]>
</script>You might want to know what is your Widget ID right ?
Okay let find it with me by clicking on Jump to widget that show you in Template and than note yourself that which widget you want .
After we configure about Java Script Code in our Template now we need to Install Some CSS Too by following me . You just Find before]]> </ b: skin> or </ style> place that CSS around them :
.makesticking{background:none!important;position:fixed!important;top:25px;z-index:99;-webkit-transform:translateZ(0);}
#HTML1 .widget-content {padding:0;margin:auto;}
Yes it will be work as charm . If there is any question about How to Make Your Widget Sticky ? Please Leave us your comment .
EmoticonEmoticon